
How to Create Bonsai?

Creating and maintaining a bonsai tree is a rewarding and artistic endeavor. Bonsai is the art of cultivating miniature trees in containers through careful pruning, wiring, and shaping. Here's a step-by-step guide on how to make a bansai:
Choose the Right Tree:
Selecting the right tree is a crucial step in bonsai cultivation. Different tree species have distinct characteristics, growth patterns, and care requirements. Here are some popular choices for bansai trees, categorized by their suitability for beginners, indoor growing, and outdoor growing:
Suitable for Beginners:
- Ficus Retusa (Ficus benjamina): Also known as the "weeping fig," it is a forgiving tree that tolerates various conditions.
- Chinese Elm (Ulmus parvifolia): Hardy and adaptable, with small leaves that reduce well in size.
Indoor Bonsai Trees:
- Ficus Retusa: Adaptable to indoor conditions, prefers bright, indirect light.

- Chinese Elm: Can be grown indoors but benefits from outdoor exposure during the growing season.
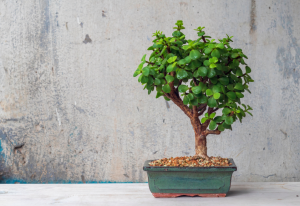
- Dwarf Jade (Portulacaria afra): Excellent for indoor bansai, requires lots of light.
Outdoor Bonsai Trees:
- Japanese Maple (Acer palmatum): Beautiful foliage and bark, prefers a cool climate.
- Juniper (Juniperus spp.): Durable and available in various varieties; good for beginners.

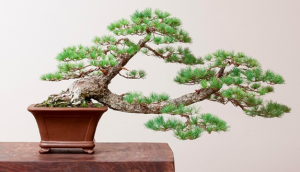
- Pine (Pinus spp.): Especially Japanese Black Pine and Scots Pine; outdoor-loving trees.
Learn how to make cheese at home?
Tropical Bonsai Trees (Indoor/Outdoor):
- Bougainvillea: Colorful flowering bansai that can be grown indoors in colder climates.

- Natal Plum (Carissa macrocarpa): Small, evergreen, and suitable for both indoor and outdoor bonsai.

Deciduous Trees (Lose Leaves in Winter):
- Japanese Maple: Known for stunning leaf shapes and colors.

- Trident Maple (Acer buergerianum): Hardy and suitable for bonsai with attractive autumn foliage.

Evergreen Bonsai Trees:
- Juniper: Diverse species with needle-like or scale-like leaves.
- Pine: Evergreen with needles; provides a classic bansai look.
Flowering Bonsai Trees:
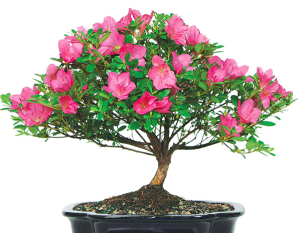
- Azalea: Beautiful flowers and small leaves; needs acidic soil.
- Cherry Blossom (Prunus serrulata): Famous for its springtime blooms.

Tolerant of Beginner Mistakes:
- Chinese Elm: Forgiving of overwatering and various light conditions.
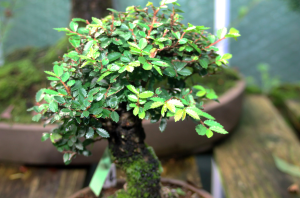
- Ficus Retusa: Resilient and adaptable.
Tips for Choosing a Bonsai Tree:
- Local Climate: Consider the climate in your region and choose a tree that thrives in those conditions.
- Size: Consider the space you have available; some trees are better suited for smaller or larger spaces.
- Species Characteristics: Research the specific care needs, growth patterns, and characteristics of the species you're interested in.
Select a Suitable Pot:

Choosing the right pot for your bonsai is an important decision as it not only affects the aesthetics but also influences the health and development of the tree. Here are some guidelines to help you select a suitable pot for your bansai:
Size:
- The pot should be proportionate to the size of your bansai. As a general rule, the width of the pot should be about two-thirds the height of the tree. The depth should be roughly the thickness of the trunk at its base.
Shape:
- Consider the style of your bansai and choose a pot that complements it. Traditional shapes include oval, rectangle, and round. Cascade and semi-cascade styles may require more unique, cascading pots.
Drainage:
- Ensure that the pot has adequate drainage holes to prevent waterlogging. Proper drainage is crucial for the health of the bonsai roots.
Material:
- Bonsai pots are commonly made from ceramic, clay, or plastic. Each material has its pros and cons. Ceramic and clay pots are popular for their aesthetic appeal and breathability but may be heavier. Plastic pots are lightweight and retain moisture better but may not have the same visual appeal.
Color:
- Choose a pot color that complements the color and style of your bansai. Earth tones are often preferred, but this can depend on personal taste and the specific characteristics of the tree.
Texture and Glaze:
- Consider the texture and glaze of the pot. Some bansai enthusiasts prefer unglazed pots for a more natural appearance, while others appreciate the aesthetics of glazed pots.
Depth:
- The depth of the pot is important for the health of the roots. Shallow pots are often used for trees with spreading surface roots, while deeper pots are suitable for trees with a more vertical root structure.
Training Stage:
- If your bonsai is still in the early training stages and requires frequent repotting, consider using a training pot. These pots are typically larger and provide more space for root development.
Matching Style:
- Match the pot style with the style of the tree. For example, a formal upright tree may look best in a classic rectangular pot, while a cascade style might suit a deep, cascading pot.
Consider the Environment:
- If you plan to keep your bonsai outdoors, choose a pot that can withstand the elements. Frost-resistant pots are essential if you live in an area with cold winters.
Personal Aesthetic:
- Ultimately, choose a pot that resonates with your taste and enhances the overall visual appeal of the bansai.
Prepare the Soil:

Preparing the right soil mix is crucial for the health and development of your bansai. Bonsai trees require well-draining soil to prevent waterlogged roots and to allow for proper aeration. Here's a basic recipe for a well-balanced bansai soil mix:
Ingredients for Bonsai Soil Mix:
Akadama:

- Akadama is a Japanese volcanic clay that retains moisture well while providing good aeration. It's a key component in many bonsai soil mixes. You can find different grades (coarse, medium, and fine).
Pumice:
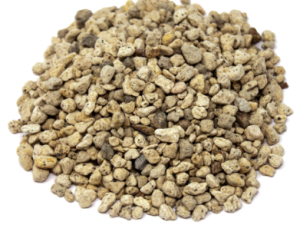
- Pumice is a lightweight, porous volcanic rock that helps with aeration and drainage. It also provides stability to the soil mix.
Lava Rock:
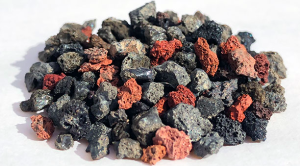
- Lava rock is another volcanic material that aids in drainage and aeration. It is coarser than pumice and helps prevent compaction of the soil.
Organic Component:
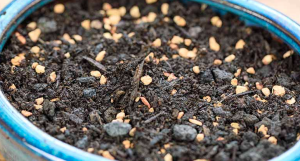
- Include an organic component to provide nutrients and improve water retention. Common choices include sphagnum moss, coconut coir, or well-decomposed pine bark. The type of organic material can vary based on the specific needs of your bansai species.
Bonsai Soil Mix Ratios:
A general starting point for a bonsai soil mix is a combination of the above components in different ratios. The specific ratio can depend on the needs of your bonsai species, local climate, and growing conditions. Here's a basic guideline:
- Akadama: 1 part
- Pumice: 1 part
- Lava Rock: 1 part
- Organic Component: Varies (start with 1/4 to 1/2 part)
Steps to Prepare Bonsai Soil Mix:
Measure and Mix:
- Measure out the components based on the ratio you've chosen. Combine them in a large container or mixing tray.
Sift the Soil:
- Sifting the soil helps separate different particle sizes, ensuring a more uniform mix. You can use a mesh screen or bansai soil sieve for this purpose.
Moisten the Soil:
- Before potting your bonsai, moisten the soil mix. This helps prevent the fine particles from becoming airborne during potting.
Adjust Ratios as Needed:
- Depending on your specific bonsai species and local conditions, you may need to adjust the ratios of the components. Some trees prefer a faster-draining mix, while others may benefit from more water retention.
Consider Bonsai Species:
- Different bonsai species have different soil requirements. Research the specific needs of your tree and adjust the soil mix accordingly.
Tips:
Avoid Garden Soil:
- Garden soil is not suitable for bansai, as it tends to be too dense and can lead to waterlogging.
Re-pot Every Few Years:
- Bonsai soil loses its structure over time. Re-pot your bansai every 2-3 years to refresh the soil and prevent compaction.
Monitor Moisture Levels:
- Pay attention to how quickly the soil dries out. Adjust the mix if the soil is staying too wet or drying out too rapidly.
Planting:
Planting a bonsai involves carefully placing the tree in a pot and arranging the soil to support its growth. Here's a step-by-step guide on how to plant a bansai:
Materials Needed:
- Bonsai tree
- Bonsai pot
- Bonsai soil mix
- Mesh or drainage screens
- Wire (optional for securing the tree)
- Root hook or chopstick (for working on the roots)
Steps to Plant a Bonsai:
Prepare the Bonsai Pot:
- Place a layer of mesh or drainage screens over the drainage holes at the bottom of the pot. This prevents the soil from washing out while allowing water to drain.
Prepare the Bonsai Tree:
- If the bansai tree is in a nursery pot, carefully remove it. Gently loosen the outer layer of soil around the roots using a root hook or chopstick. If the tree is in a training pot, carefully lift it out.
Trim and Prune Roots:
- Inspect the roots and trim any long or circling roots. Prune away any dead or damaged roots. This encourages the development of a compact and healthy root system.
Position the Bonsai in the Pot:
- Place the bonsai in the pot, ensuring that it is positioned slightly off-center for aesthetic purposes. The front of the tree, where the main features are visible, should face the viewer.
Add Bonsai Soil:
- Begin adding the bansai soil mix around the roots. Use a chopstick or your fingers to work the soil between the roots, ensuring there are no air pockets.
Secure the Bonsai (Optional):
- If your bonsai requires additional stability, you can use wire to secure it in the pot. Thread the wire through the drainage holes and twist it around the trunk or anchor it to the pot's sides.
Level the Soil:
- Ensure that the soil is level and covers the roots uniformly. Gently tap the pot on a hard surface to settle the soil and eliminate air pockets.
Water the Bonsai:
- Water the bansai thoroughly to settle the soil around the roots. Allow excess water to drain out.
Top Dressing (Optional):
- Add a layer of decorative moss or small pebbles on top of the soil for aesthetic purposes. This also helps retain moisture and provides a finished look.
Place the Bonsai in its Growing Environment:
- After potting, place the bansai in a location that suits its light and temperature requirements. Some trees prefer full sunlight, while others do better in partial shade.
Monitor and Adjust:
- Keep an eye on the bonsai's moisture levels, and adjust your watering routine as needed. Additionally, monitor the tree for signs of stress or issues with the soil.
Pruning:
Pruning is a fundamental aspect of bonsai care and is crucial for shaping and maintaining the desired size and form of the tree. Bonsai pruning involves the removal of specific parts of the tree, including branches, leaves, and roots. Here's a step-by-step guide on how to approach pruning for your bansai:
Tools Needed:

Pruning Shears:

- Used for cutting small branches and twigs.
Concave Cutter:

- Ideal for removing larger branches and creating clean cuts.
Knob Cutter:

- Specifically designed for removing knobs and protrusions left after pruning branches.
Root Pruning Shears:
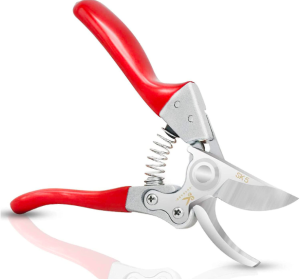
- For trimming roots during repotting.
Steps for Bonsai Pruning:
Understand Bonsai Styles:
- Different bonsai styles have specific pruning techniques. Familiarize yourself with the style of your bansai and understand the principles of formal upright, informal upright, cascade, semi-cascade, and other styles.
Identify the Design:
- Have a clear vision of the design you want for your bonsai. Identify the main branches and the overall structure you wish to achieve.
Prune Unwanted Branches:
- Begin by pruning away any unwanted branches, especially those that disrupt the desired shape or compete for dominance. Use pruning shears for smaller branches and concave cutters for larger ones.
Prune for Balance:
- Maintain a sense of balance and proportion in the tree. Avoid having too much foliage on one side or overly dense areas. Prune to create open spaces within the canopy.
Remove Crossed Branches:
- Eliminate branches that cross each other, as they can create issues with crowding and rubbing. Choose the stronger and more aesthetically pleasing branches to keep.
Consider Branch Taper:
- Maintain a sense of taper in the branches, meaning that branches should be thicker at the base and gradually become thinner towards the tips. This contributes to the overall natural appearance of the tree.
Remove Diseased or Damaged Parts:
- Prune away any diseased, dead, or damaged branches. This promotes overall tree health and prevents the spread of diseases.
Control Growth:
- Regular pruning helps control the growth of your bonsai. Trim back new shoots to maintain the desired shape and prevent the tree from becoming too leggy.
Leaf Pruning (Defoliation):
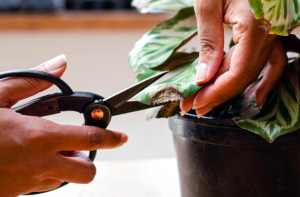
- In some cases, especially with deciduous trees, leaf pruning can be performed to reduce leaf size and encourage ramification. This is typically done during the growing season.
Use Appropriate Tools:
- Select the right tool for the job. Pruning shears are suitable for small branches, while concave cutters are better for larger branches. Knob cutters are used for removing protrusions and knobs.
Wound Care:
- After making cuts, apply cut paste or wound sealant to promote faster healing and protect the tree from pests and diseases.
Step Back and Evaluate:
- Periodically step back and assess your progress. Consider the overall design and make adjustments as needed.
Tips:
Prune with Purpose:
- Every cut you make should have a purpose, whether it's to enhance the tree's structure, improve balance, or encourage new growth.
Avoid Overpruning:
- While pruning is necessary, avoid over-pruning, especially in a single session. Gradual, well-timed pruning sessions are generally more effective.
Learn from Experience:
- Over time, you'll learn more about your specific bonsai species' growth patterns and responses to pruning. Observation and experience are valuable teachers.
Wiring:

Wiring is an essential technique in bansai cultivation used to shape and style the branches and trunk of a tree. It allows you to guide the growth of your bonsai into the desired form. Here's a step-by-step guide on how to wire a bonsai:
Tools Needed:
Bonsai Wire:
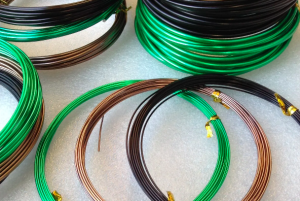
- Select an appropriate gauge and length of bansai wire. The wire should be about one-third the thickness of the branch or trunk you are wiring.
Wire Cutters:

- Used for cutting the wire to the desired length.
Pliers:

- Round-nose pliers are useful for creating loops and adjusting the wire.
Pain-free normal baby delivery. What are the benefits of this process?
https://livewithgreen.com/details-on-how-to-create-bonsai/
.jpg)